Swarovski Crystals Wedding Fascinator Embellishment Project
As a fashionable woman, attending a wedding is always an exciting occasion. It's an opportunity to showcase your personal style, while also adhering to the formal dress code. If you are looking for a unique way to make a statement and stand out from the crowd, why not consider upgrading your feather fascinator with stunning rhinestone embellishments? In this easy to follow how to guide, we will explore how Swarovski Crystals from Bluestreak Crystals can elevate your fascinator and add a touch of glamour and sophistication to your wedding ensemble.
The beauty of Swarovski Crystals lies in their versatility and ability to transform any accessory into a one-of-a-kind piece. To upgrade your gold feather fascinator, start by selecting high-quality rhinestones from Bluestreak Crystals. The intricate designs and superior sparkle of these crystals will instantly elevate your fascinator to the next level.
Before starting your crafty endeavour, make sure you have all the necessary materials. Find your perfect shade of fascinator that you wish to upgrade, a collection of Swarovski crystals in your preferred shades, and a few simple tools all listed below. In this example we used a size mix of one best-selling crystal colours.
Apply Online & Buy Swarovski Crystals
Bluestreak Crystals is one of very few worldwide Swarovski Authorised Distribution Partners that continue to sell the complete range of Swarovski Crystals to Brands, Businesses and Professionals. Complete the application form online and use the highest quality crystals for your finished products and services. Alternatively, we would recommend using Serinity Crystals as a perfect substitute for the crystal components used in this embellishment project.
Component List:
The full list of Swarovski crystals, components and tools needed to complete this project can be found below. If you click on the product description (link), the respective product page will open, where each item can be viewed and added to cart:
| Component | Component Name / Link To Purchase | Quantity |
 |
Fascinator of your choice | x 1 |
 |
x 1 | |
 |
Ninja Supertite Fusion Tack Glue Kit | x 1 |
 |
Wax Crystal Picker Tool | x 1 |
 |
Magic Sorting Tray | x 1 |
Instructions
Step 1
Prepare your workspace
For this project you are going to need a large flat, well-lit area to neatly spread out your tools so that everything is in easy reach for the rhinestone embellishment and so that you can leave it to dry without risk of disturbance.
Step 2
Prepare the glue
Fill the Syringe with enough SuperTite Fusion Tack Glue for your project, be careful to not take more glue than you need. The easiest way to do this is to remove the plunger from the back of the syringe and then slowly squeeze the glue into the tube, so that the glue gently runs down one side without reaching the opening at the other end. It is important that air can pass out the other end without affecting the glue inside at this stage. Then reinsert the plunger as carefully as you can – you will face resistance because the seal needs to be airtight, the plunger is successfully reattached when you hear it pop into place.
Step 3
Guard against air bubbles in the glue syringe
Once the plunger is securely back in, you are likely to have a section of air inside the syringe. To fix this simply hold the syringe vertically so that the glue slides down away from the opening at the top and gently push on the plunger, pushing the air out until there is only glue left inside. You can then attach the needle tip, completing the syringe.
Step 4
Apply the glue
Use the loaded syringe to squeeze out tiny dots of glue across the surface of the fascinator wherever you wish to place a crystal. Be careful to not apply too much, otherwise you will risk the glue squishing up around the crystal when you press it down onto the glue and this can hinder the final sparkle. We also advise doing this stage in small sections when working on three dimensional objects to minimise the risk of accidentally touching the glue or knocking a rhinestone while it’s still wet.
Step 5
Place the crystals
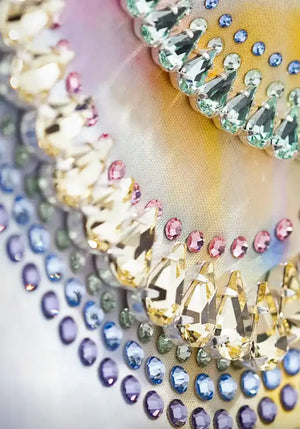
Use the Wax Picker Pen to gently place the Swarovski Crystals onto the glue. Be sure to make full use of the different sizes available on our website and don’t be afraid to combine different colours and shapes to best suit your ensemble. We chose to do a Scatter Ombre embellishment style, which uses all of the sizes available in the Swarovski Golden Shadow Size Mix and gives the finished embellishment a gentle and elegant result.
STEP 6
Let the glue dry
Allow the glue to dry overnight, once the glue is safely dry it is ready to wear and is waterproof so if you find yourself dealing in bad weather you won’t have to worry about crystals falling off!
Congratulations you have completed the project !
When you upgrade your gold feather fascinator with rhinestone embellishments using Swarovski Crystals from Bluestreak Crystals, and you're guaranteed to turn heads at the wedding. The combination of the elegant gold base and the dazzling sparkle of the rhinestones creates a stunning effect that is sure to impress. Whether you're a craft enthusiast or a generally fashion-forward woman, incorporating these beautiful crystals into your fascinator is a surefire way to elevate your style and make a memorable impression. So, go ahead and unleash your creativity to create a truly unique and breathtaking piece that you'll cherish for years to come.


