Resin jewelry has taken the crafting world by storm, and it's not hard to see why. With its versatility, durability, and endless creative possibilities, resin has become a favorite medium for both beginners and experienced jewelry makers alike. So if you've been admiring those glossy, colorful pieces and wondering how to make your own, you've come to the right place! Let’s take a look at everything you need to know to start creating your own stunning resin jewelry pieces.
Before we dive into the nitty-gritty of resin jewelry making, let's talk about what you'll need to get started. Don't worry if you're new to this - everyone starts somewhere, and with a bit of practice, you'll be creating beautiful pieces in no time.
To begin your resin jewelry journey, you'll need a few key items:
Don't feel overwhelmed by this list! You can start with the basics and expand your toolkit as you get more comfortable with the process. If you're looking for more general information on jewelry making, our jewelry making guide is a great resource for beginners.
Before we get our hands dirty (or should I say, resin-y?), let's talk about safety. Working with resin can be fun, but it's important to protect yourself:
Always work in a well-ventilated area. Wear gloves to protect your skin from the resin. Use a respirator mask to avoid inhaling fumes. Keep your work area clean and covered to protect surfaces.
Remember, safety first! These precautions might seem like a hassle, but they're key for ensuring you can enjoy your new hobby for years to come.
Now that we've covered the basics, let's get into the fun part - actually making resin jewelry!
The first step in any resin project is mixing your resin and hardener. This process is crucial for achieving the right consistency and ensuring your jewelry cures properly. Here's how to do it:
This is where you can let your creativity shine! You can add pigments to color your resin, or include items like glitter, dried flowers, or even small charms. Just remember not to add too much - a little goes a long way.
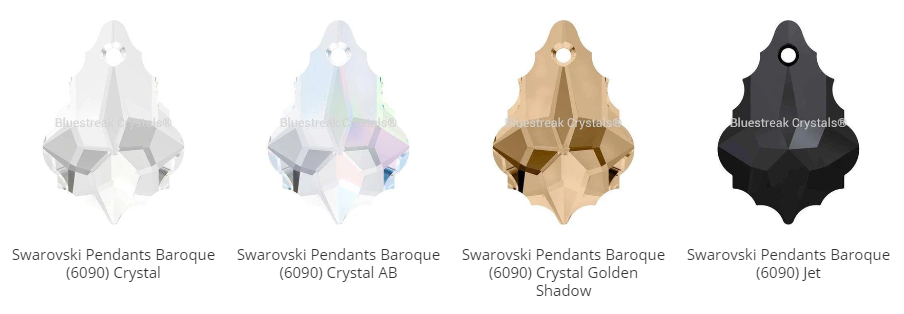
If you're looking to add some sparkle to your resin pieces, you might want to buy high quality Swarovski pendants for decoration. These can be embedded in resin to create stunning, crystal-clear jewelry.
Once your resin is mixed and colored to your liking, it's time to pour:
As you get more comfortable with basic resin jewelry making, you might want to try some more advanced techniques.
Layering different colors of resin or embedding objects at different depths can create stunning 3D effects. To do this, pour a thin layer of resin and let it partially cure before adding your next layer or object.
While simple silicone molds are great for beginners, as you progress, you might want to try more complex shapes or even create your own molds. Silicone putty is great for making custom molds of small objects.
Once your resin is fully cured, you might need to do some finishing work:
It’s fair to say that the possibilities with resin jewelry are nearly endless - here are a few more ideas to get your creative juices flowing:
Try embedding real flowers, leaves, or small seashells in your resin for a beautiful, natural look.
Create bold, modern pieces by layering different colors of resin in geometric shapes.
Resin is perfect for creating personalized jewelry. Try embedding small photos, handwritten notes, or meaningful trinkets in your pieces.
It’s simple - creating resin jewelry is a rewarding hobby that allows you to express your creativity in unique ways, and could perhaps even turn into your very own small business! While it might seem intimidating at first, with practice and patience, you'll be creating beautiful, professional-looking pieces in no time. Remember, every artist started as a beginner, so don't be afraid to experiment and make mistakes - that's how we learn and grow.